
Halters are an essential tool for horse owners and handlers. They allow you to safely lead, tie, and control your horse while performing various tasks such as grooming, feeding, and vet procedures. However, if you’re new to horses, putting on a halter may seem like a daunting task. Don’t worry, though, with a little practice and patience, you’ll soon become a pro at haltering your horse. In this article, we’ll guide you through the process of how to put a halter on a horse step by step.
Seemore: Can Horses Eat Grapes? – All Important Things You Should Know
1. Understanding the Basics of Halters

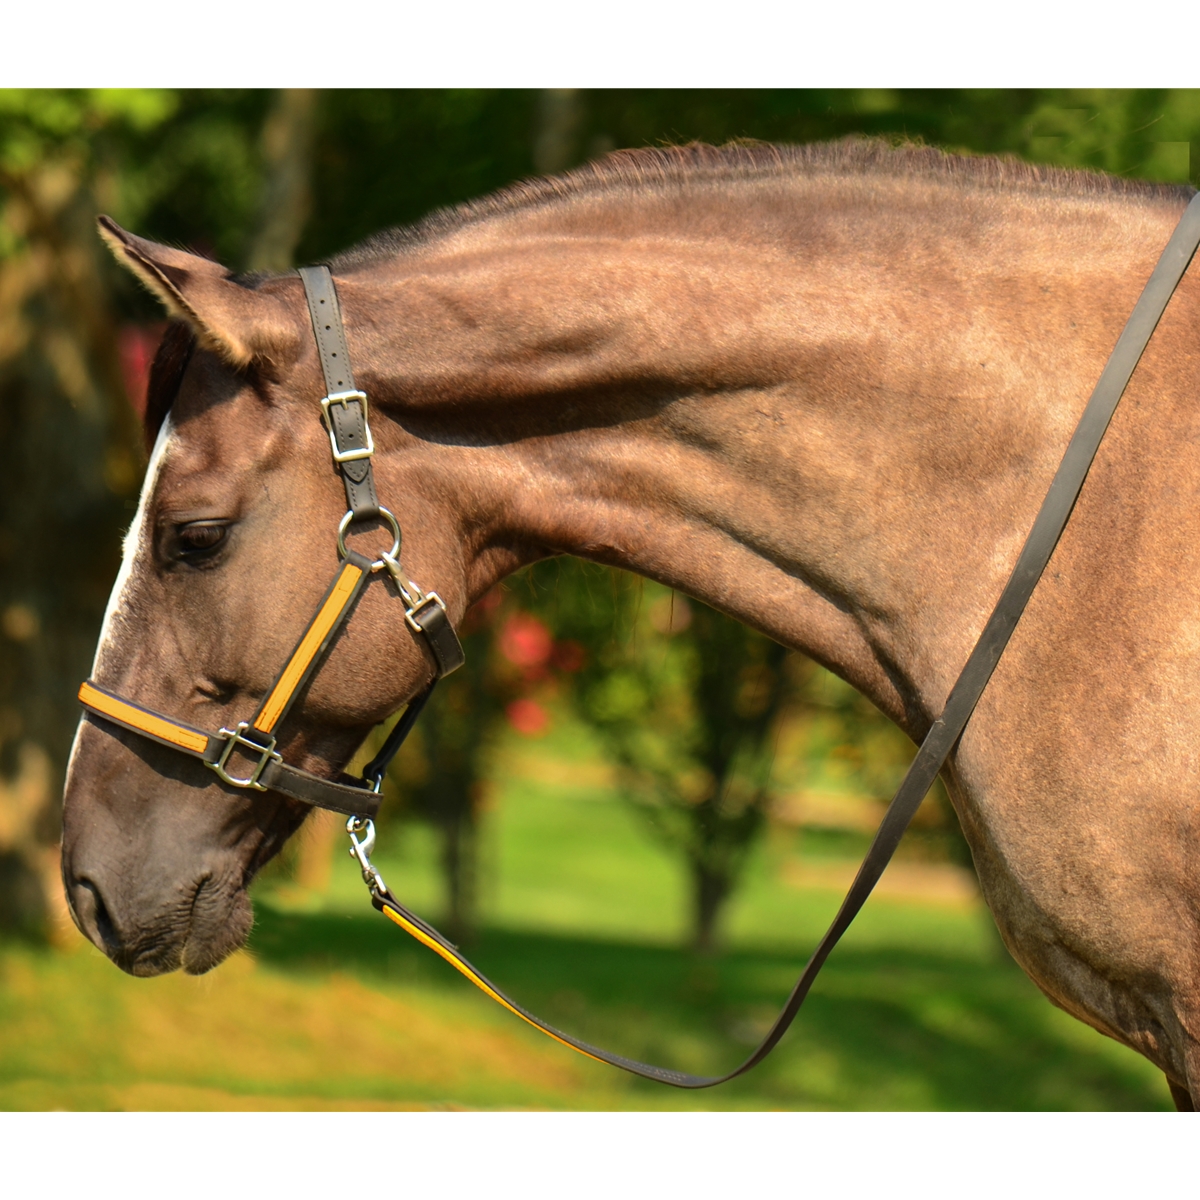
What is a Halter?
A halter is a type of headgear that is used to lead, tie, and control horses. It consists of a noseband, cheekpieces, and a headstall that goes behind the ears. The noseband is the part of the halter that goes over the horse’s nose, while the cheekpieces and headstall are attached to it.
Types of Halters
There are various types of halters available in the market, each designed for a specific purpose. Some common types include:
- Nylon Halters: These are the most popular type of halters and are made from synthetic materials. They come in various colors and sizes and are suitable for everyday use.
- Leather Halters: These are more expensive than nylon halters but are stronger and more durable. They are often used for showing or special occasions.
- Rope Halters: Made from braided rope, these halters have knots instead of buckles and are useful for training and groundwork.
- Foal Halters: Smaller and lighter than regular halters, these are specifically designed for young foals.
- Padded Halters: These halters have a soft padding on the noseband and cheekpieces for added comfort for the horse.
Choosing the Right Halter
When it comes to choosing a halter, there are a few things to keep in mind. Firstly, make sure the halter fits your horse properly – not too loose or too tight. Ensure that the noseband sits comfortably above the nostrils without obstructing breathing. The headstall should be long enough to allow you to buckle it behind the ears without causing any discomfort.
2. Preparing Your Horse

Getting Your Horse’s Attention
Before you can put a halter on your horse, you need to get their attention. If your horse is in a stall, call their name or softly whistle to alert them. If they are in a paddock or pasture, approach them slowly, speaking softly to let them know you’re approaching.
Grooming Your Horse
Before haltering your horse, it’s essential to groom them first. This will not only help remove any dirt or debris from their coat but also help you bond with your horse. Start by brushing their body with a curry comb, followed by a stiff brush to remove any loose hair and dirt. Follow up with a soft brush to give their coat a shiny finish.
Handling Your Horse’s Head
Once your horse is groomed, you can begin working on putting on the halter. Always approach your horse from the side, never directly in front of them. Place your hand on their forehead between their eyes and gently guide their head down towards their chest. This will encourage them to lower their head for easier haltering.
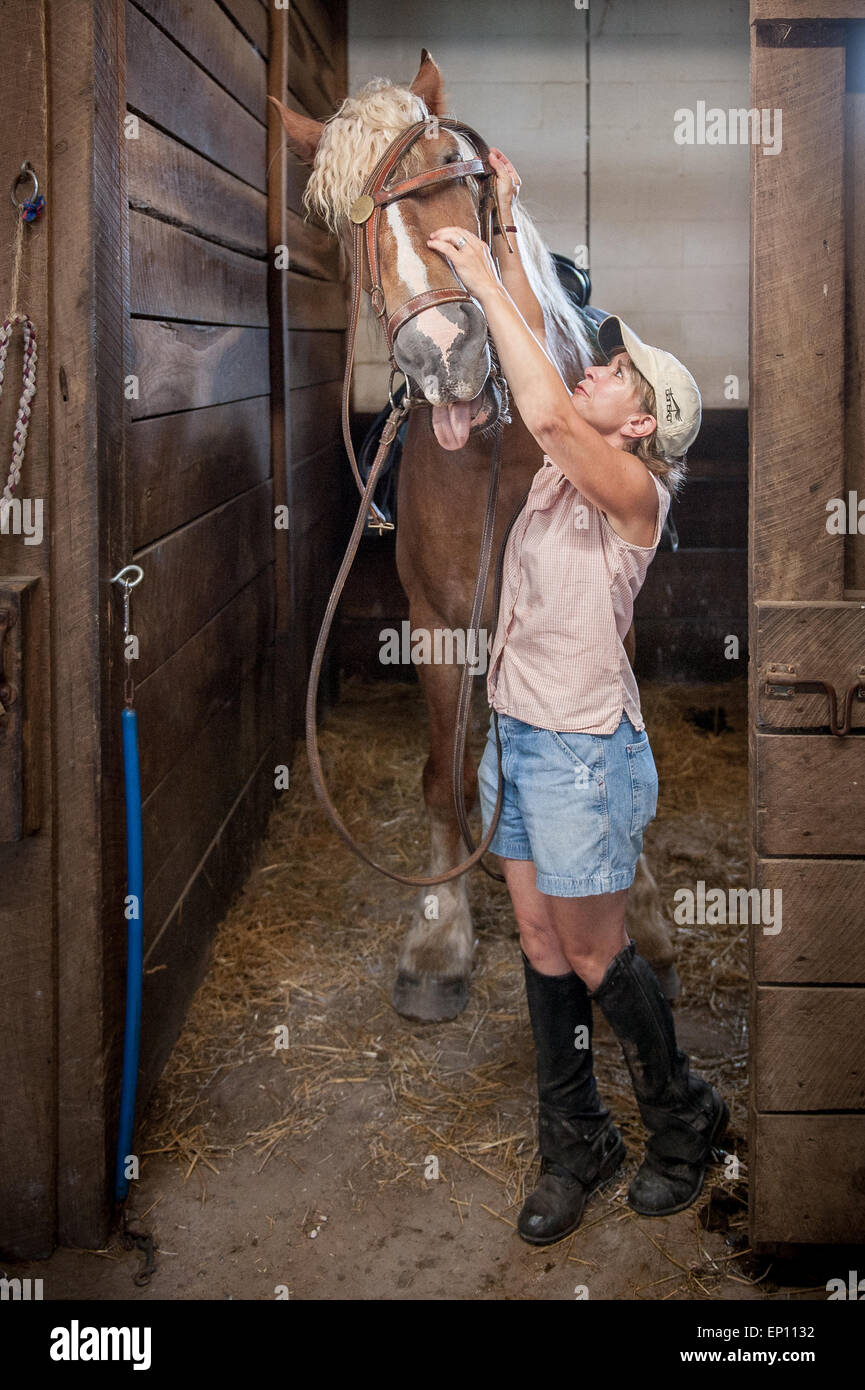
3. Putting on the Halter

Positioning the Noseband
Start by placing the noseband over your horse’s nose, making sure it sits comfortably above the nostrils. With your other hand, hold the halter’s cheekpieces behind their ears to keep it in place.
Buckling the Headstall
Next, you need to buckle the headstall behind the horse’s ears. To do this, slide the end of the headstall through the buckle and adjust the fit by moving the buckle up or down. Make sure it’s not too tight, as this can cause discomfort for your horse.
Securing the Cheekpieces
After buckling the headstall, secure the cheekpieces on the sides of the halter. You can either use a snap or tie them using a quick release knot. It’s important to ensure that the cheekpieces are secured tightly so that your horse cannot easily slip out of the halter.
4. Leading Your Horse
Holding the Lead Rope
To lead your horse, hold the lead rope in your right hand with about 6 inches of slack. Use your left hand to support the lead rope as needed. The lead rope should always be held at a comfortable distance from your horse – too close, and they might feel restricted; too far, and they might wander off.
Leading Your Horse
To lead your horse, walk alongside them, slightly ahead of their shoulder, facing forward. Use gentle cues such as a slight tug on the lead rope to guide your horse in the direction you want them to go. Avoid pulling too hard, as this can cause discomfort and resistance from your horse.
Stopping and Turning
To stop your horse, pull back on the lead rope while saying “whoa” in a calm, firm voice. To turn your horse, use gentle pressure on the lead rope in the direction you want them to turn. Always remember to praise and reward your horse when they respond correctly to your cues.
5. Tying Your Horse
Choosing the Right Tie-Up Spot
When tying your horse, it’s important to choose a safe and secure spot. A sturdy hitching post or a solid fence post are ideal options. Avoid using flimsy objects such as trees or gates, as they may break or give way if your horse pulls back.
Using the Quick Release Knot
To tie your horse safely, use a quick release knot, also known as the “blocker knot.” This knot is designed to release quickly in case of an emergency, allowing you to free your horse without causing any harm. To tie the knot, wrap the lead rope around the hitching post twice and create a loop by bringing the end of the rope over the top of the wraps. Then thread the end of the rope through the loop and pull it tight.
Tying Your Horse Safely
Once you’ve tied the knot, you can clip the lead rope to the halter and tighten it slightly. Never tie your horse too tightly or leave them unattended while tied. If your horse begins to panic or pull back, the quick release knot will allow them to break free without getting injured.
FAQs

Q: How do I know if my halter fits correctly?
A: A well-fitting halter should not be too tight or too loose. The noseband should sit comfortably above the nostrils without obstructing breathing, and the headstall should be long enough to buckle behind the ears without causing discomfort.
Q: Can I use a rope as a halter?
A: While you can use a rope as a makeshift halter in an emergency, it’s not recommended for regular use. Rope halters are specifically designed for training and groundwork and may not provide proper comfort and support for daily use.
Q: How often should I replace my horse’s halter?
A: Halters, particularly nylon ones, can become worn and damaged over time. It’s recommended to regularly check your horse’s halter for any signs of wear and tear and replace it if needed.
Q: Can I put a halter on my horse by myself?
A: Yes, with practice, you can learn to halter your horse by yourself. However, it’s always recommended to have someone supervise or assist you, especially if you’re new to horses.
Q: How do I remove the halter from my horse?
A: To remove the halter, unbuckle the headstall behind the ears and unclip the cheekpieces or untie the quick release knot. Then gently slide the noseband off your horse’s nose.
Conclusion
Putting a halter on a horse may seem like a daunting task, but with a little practice and patience, you’ll soon be able to do it with ease. Remember to always approach your horse calmly and use gentle cues when leading or tying them. By following the steps outlined in this guide, you’ll soon become a pro at haltering your horse.